Configuring your email account in different versions of Microsoft Outlook is very similar. The screenshots below are taken from Outlook 2010. The steps vary slightly if you are using Outlook 2007 or Outlook 2003. Notes are included in each step detailing any differences you will encounter when setting up your email in Outlook 2007 or Outlook 2003.
- Configure Microsoft Outlook Using IMAP
- Configure Microsoft Outlook Using POP3
- Configure Microsoft Outlook 2011 for Mac
Configure Microsoft Outlook using IMAP
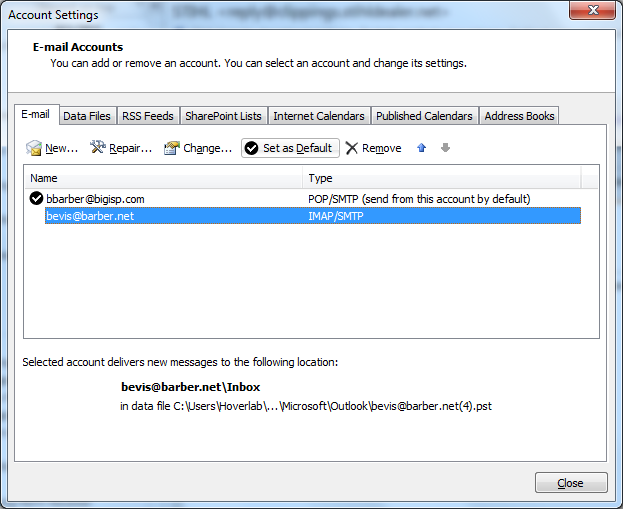
- Click on the File tab, select Info, and then click on the Account Settings button and select Account Settings.
Outlook 2007: Click on the Tools menu and select Account Settings.
Outlook 2003: Click on the Tools menu and select E-mail Accounts. Select Add a new e-mail account and click Next.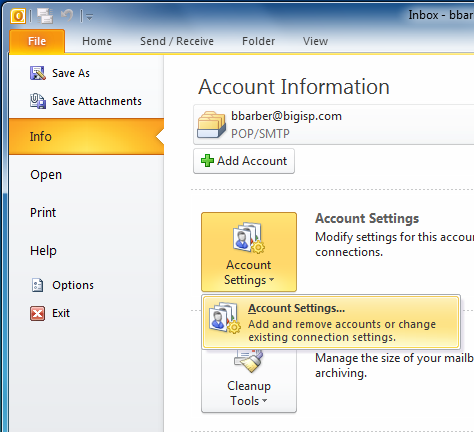
- Click on New to add your email address.
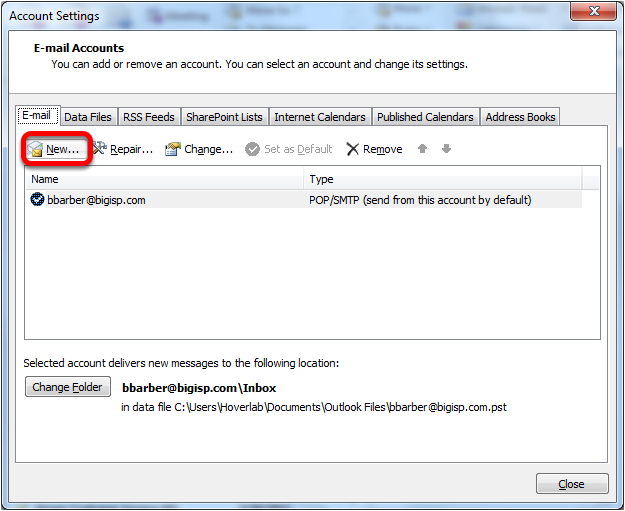
Outlook 2003: Select IMAP and click Next.
- If you do not have existing email accounts in Outlook, skip ahead to the next step.
Select Email Account and click Next.
Outlook 2007: Select Microsoft Exchange, POP3, IMAP, or HTTP and click Next.
Outlook 2003: Skip this step.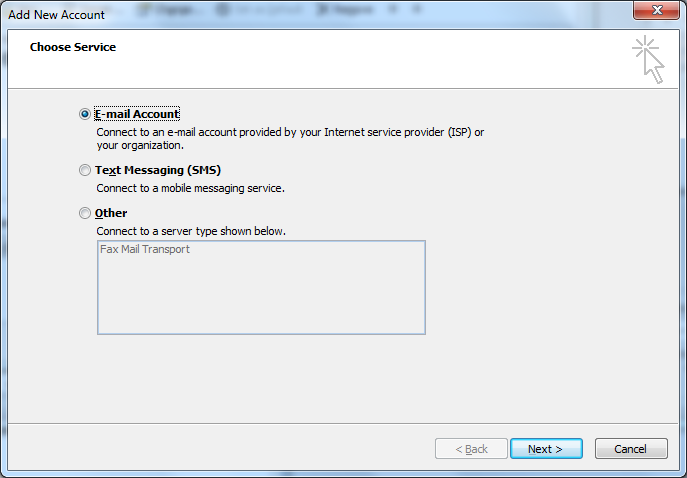
- Select Manually configure server settings or additional server types and click Next.
Outlook 2003: Skip this step.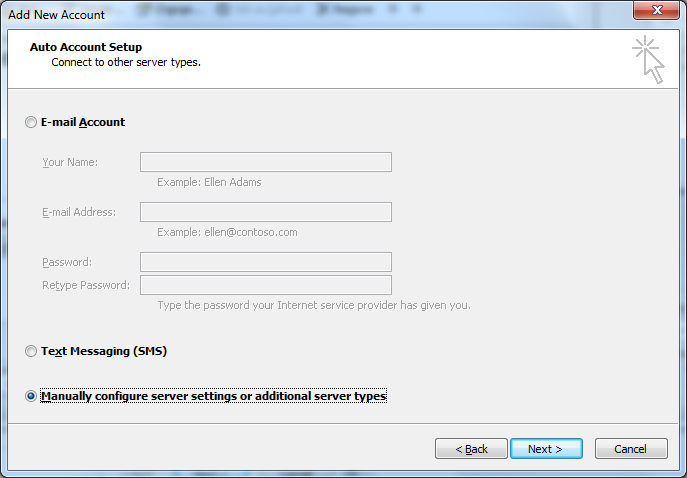
- Select Internet E-mail and click Next.
Outlook 2003: Skip this step.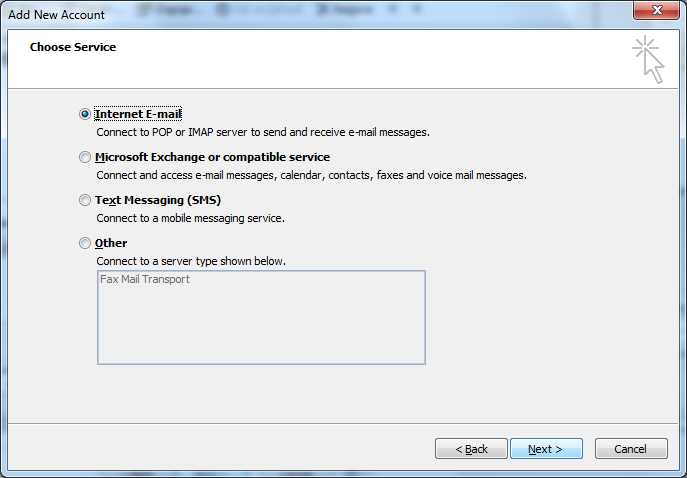
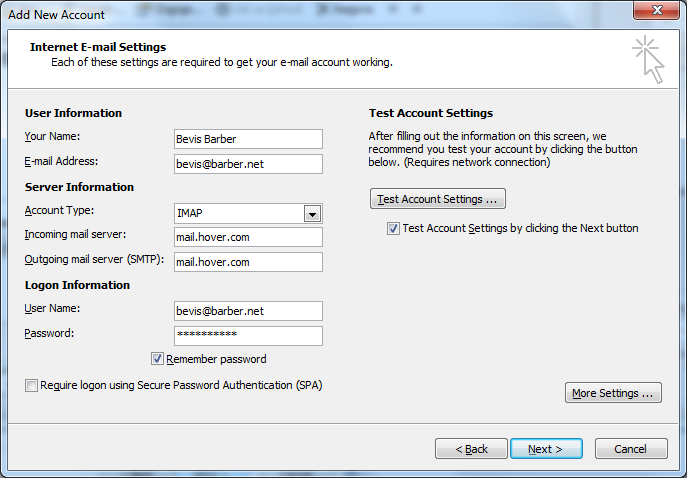
- Enter the following email settings:
Your Name: Enter your name as want it to appear on your outgoing messages.
Email Address: Enter your full email address.
Account Type: Select IMAP (Outlook 2010 and 2007 only)
Incoming mail server: mail.yourdomain.com
Outgoing mail server (SMTP): mail.yourdomain.com OR mail.yourISP.com
User Name: Enter your full email address.
Password: Enter your email password and put a check next to Remember password.
After filling in all of the email settings, click on More Settings.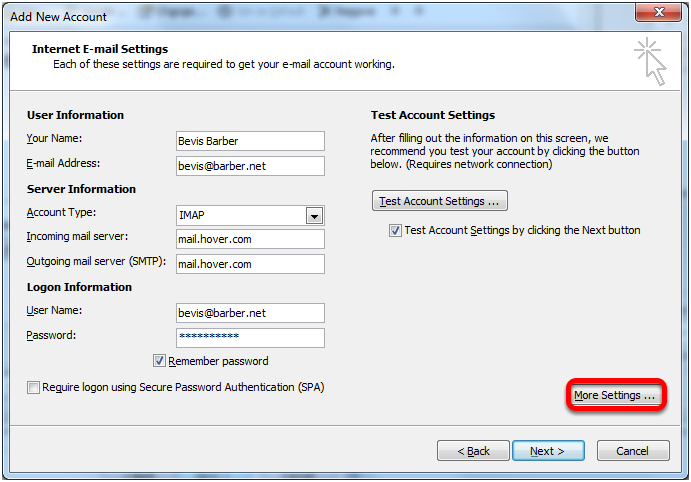
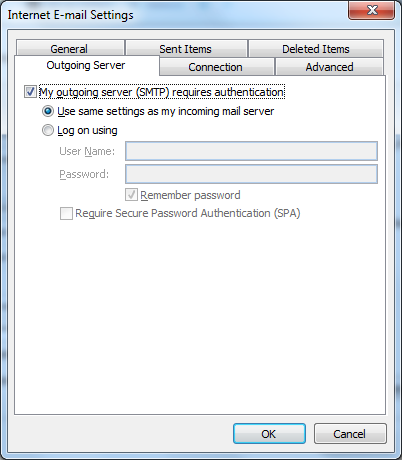
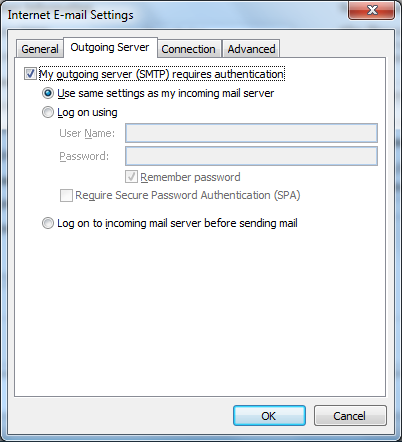
- Select the Outgoing Server tab and then put a check next to My outgoing server (SMTP) requires authentication. Leave the default option, Use same settings as my incoming mail server, selected.
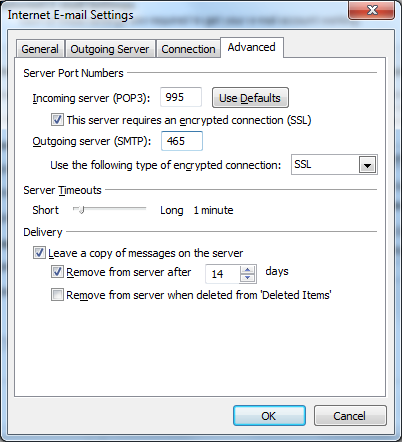
- Select the Advanced tab. Under the Incoming server (IMAP) and the Outgoing server (SMTP) select SSL from the drop down lists labeled Use the following type of encrypted connection. Next, change the outgoing server port number from 25 to 465.
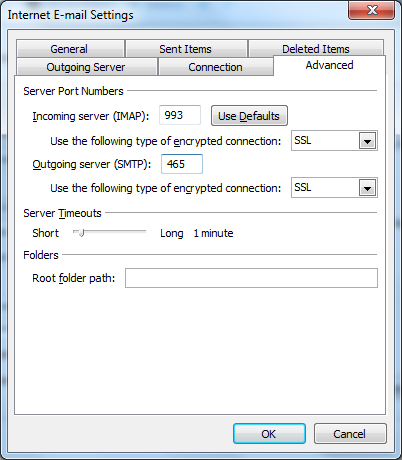
Click OK.
- Click Next.
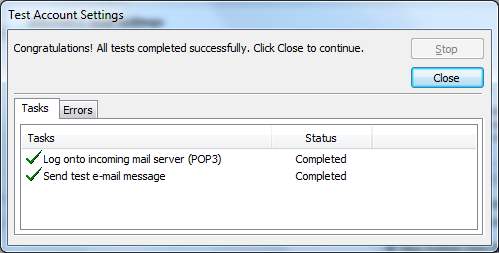
- Outlook 2010 users will automatically receive a Test Account Settings pop-up window. All tests will have status Completed if the configuration was successful.
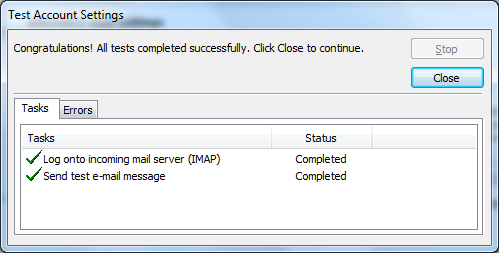
Click Close.
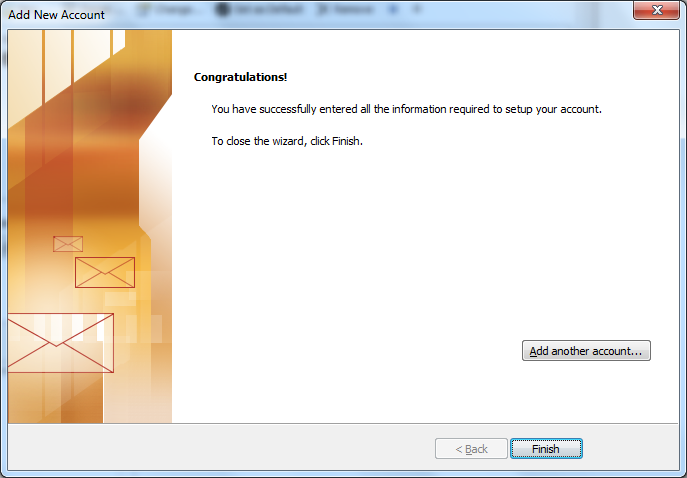
- Click Finish.
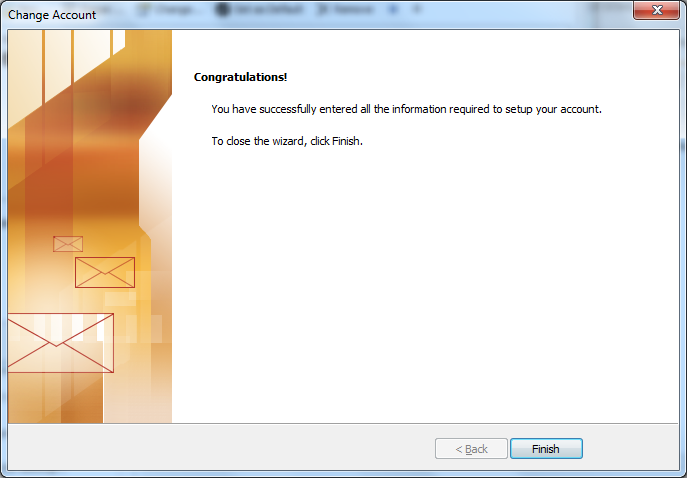
- Click Close.
Your email account configuration has been completed!
Configure Microsoft Outlook Using POP3
- Click on the File tab, select Info, and then click on the Account Settings button and select Account Settings.
Outlook 2007: Click on the Tools menu and select Account Settings.
Outlook 2003: Click on the Tools menu and select E-mail Accounts. Select Add a new e-mail account and click Next. - Click on New to add your email address.
Outlook 2003: Select POP3 and click Next. - If you do not have existing email accounts in Outlook, skip ahead to the next step.
Select Email Account and click Next.
Outlook 2007: Select Microsoft Exchange, POP3, IMAP, or HTTP and click Next.
Outlook 2003: Skip this step. - Select Manually configure server settings or additional server types and click Next.
Outlook 2003: Skip this step. - Select Internet E-mail and click Next.
Outlook 2003: Skip this step. - Enter the following email settings:
Your Name: Enter your name as want it to appear on your outgoing messages.
Email Address: Enter your full email address.
Account Type: Select POP3 (Outlook 2010 and 2007 only)
Incoming mail server: mail.yourdomain.com
Outgoing mail server (SMTP): mail.yourdomain.com OR mail.yourISP.com
User Name: Enter your full email address.
Password: Enter your email password and put a check next to Remember password.
After filling in all of the email settings, click on More Settings.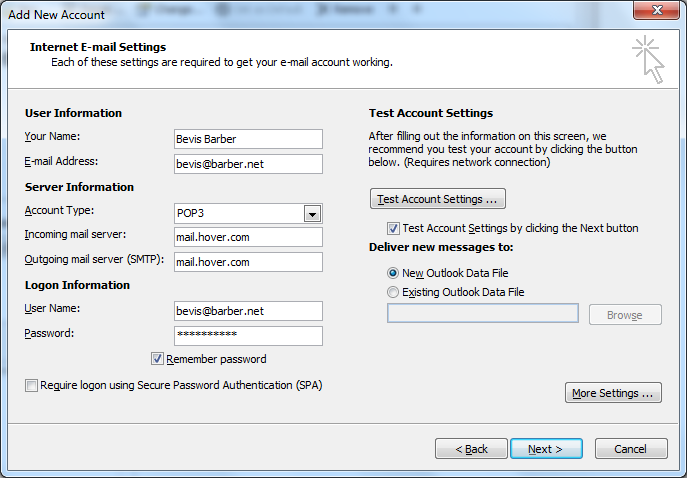
- Select the Outgoing Server tab and then put a check next to My outgoing server (SMTP) requires authentication. Leave the default option, Use same settings as my incoming mail server, selected.
- Select the Advanced tab. Under the Incoming server (IMAP) and the Outgoing server (SMTP) select SSL from the drop down lists labeled Use the following type of encrypted connection. Next, change the outgoing server port number from 25 to 465.
Click OK. - Outlook 2010 users will automatically receive a Test Account Settings pop-up window. All tests will have status Completed if the configuration was successful.
Click Close. - Click Finish.
- Click Close.
Your email account configuration has been completed!
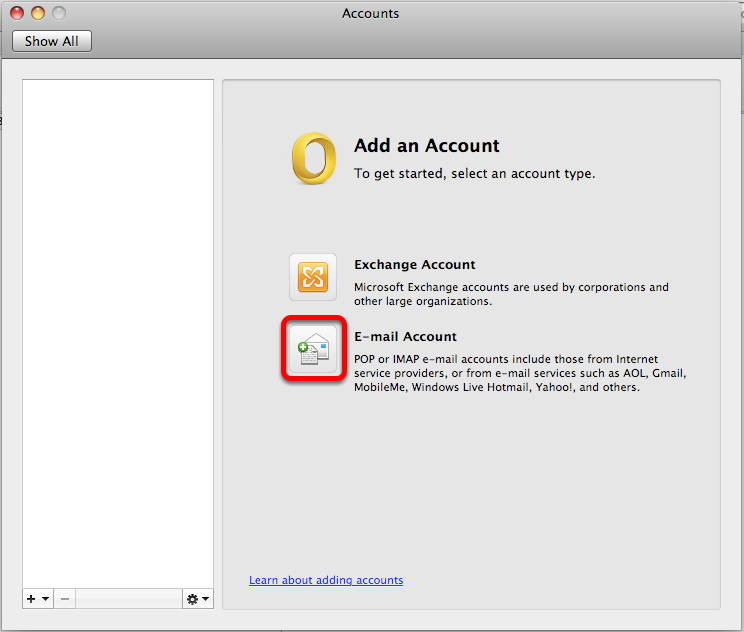
Configure Microsoft Outlook 2011 for Mac
To configure email in Outlook 2011 for Mac, use the following steps:
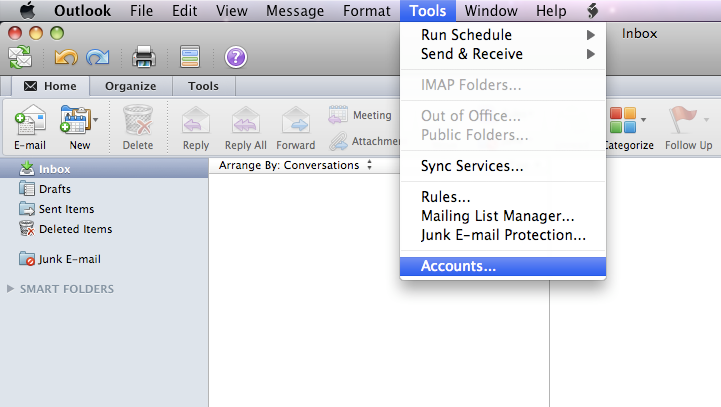
- Open Outlook. Click on the Tools menu and select Accounts.
- Click on the Email Account option.
- Enter the following settings:
E-mail address: enter your email address
Password: enter your email password
User name: enter your email address
Type: IMAP (Note - POP3 is also supported by our mail server. We recommend IMAP but you can select POP3 if that is your preference)
Incoming server: mail.yourdomain.com
Use SSL to connect (recommended) needs to be checked
Outgoing server: mail.yourdomain.com OR mail.yourISP.com
Put a check next to Override default port and also put a check next to Use SSL to connect (recommended). Next, change the port number from 25 to 465.
Click on Add Account after you have all of the settings entered.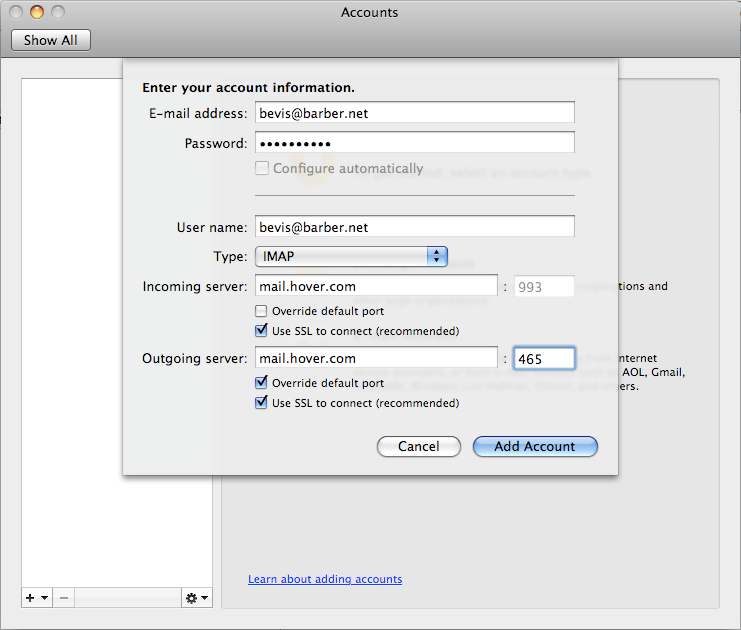
- Click on the More Options button. Select Use Incoming Server Info from the authentication list and then click OK.
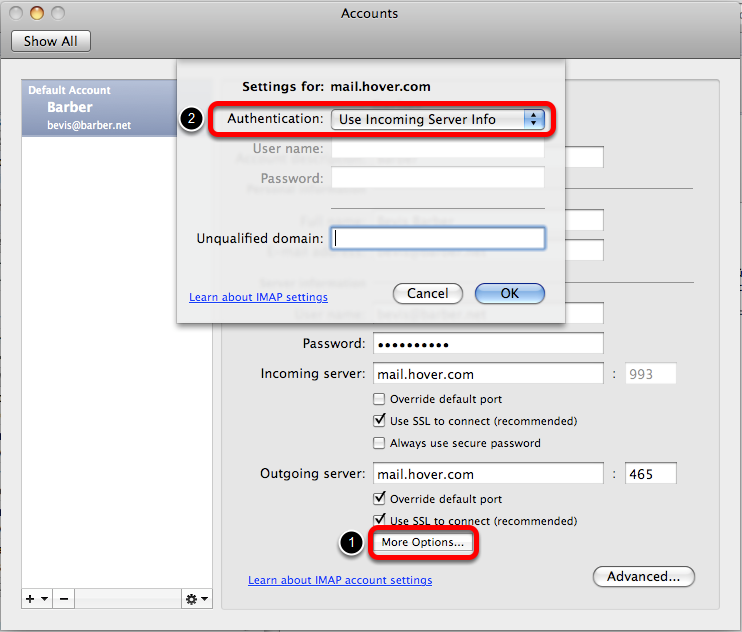
- Close the Accounts window.

- Outlook will automatically download your email messages and IMAP folders. The account configuration is completed!